Enable Microsoft Print to PDF
About
Windows 10 offers a built-in way to print a document to a PDF file. For some reason, if this option is missing from your list of printers, follow this guide to re-enable it.
Instructions
Enable Microsoft Print to PDF Feature
Press the start menu and type in "windows features." Click on "Turn Windows features on or off."
Scroll to the "Microsoft Print to PDF" feature.
If it's already enabled, then disable it and press OK. Open the "Turn Windows features on or off" app again, enable the feature and then press OK.
If it's not already enabled, then enable it and press OK.
Open the print dialog for this page and look for the "Microsoft Print to PDF" option. If you see it, then it worked and you're good to go. If not, you can add the printer manually by following the directions below.
Manually Add Microsoft Print to PDF Printer
If the above directions didn't work, then you can manually add the feature as a custom printer.
Open the start menu and type in "add printer." Click on "Printers & scanners."
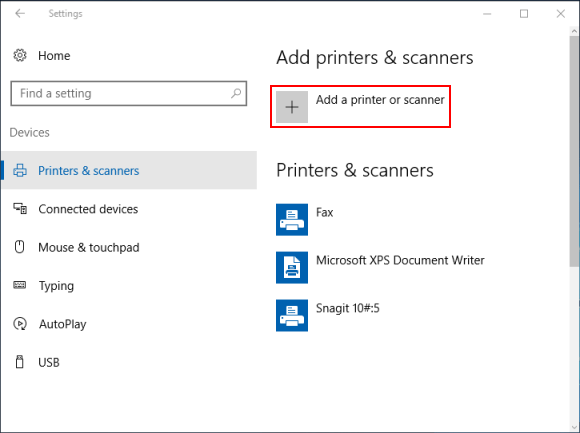
Click on Add a printer or scanner under Printers & scanners.
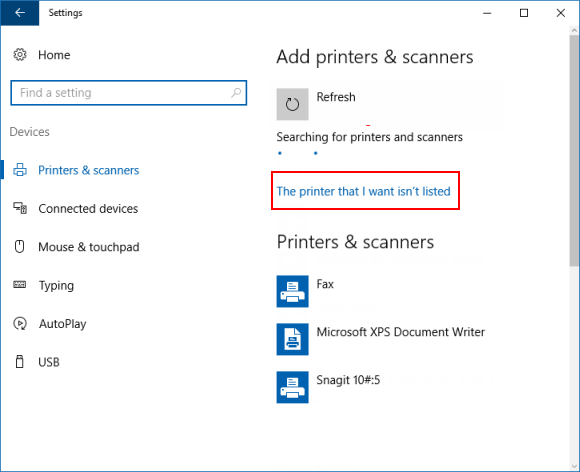
Click on The printer I want isn't listed link.
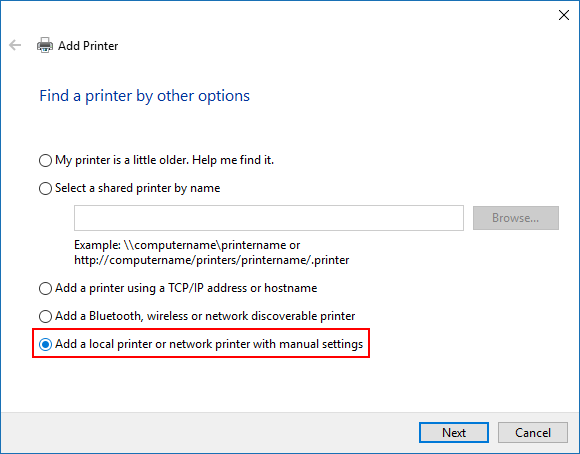
Select Add a local printer or network printer with manual settings and click on Next.
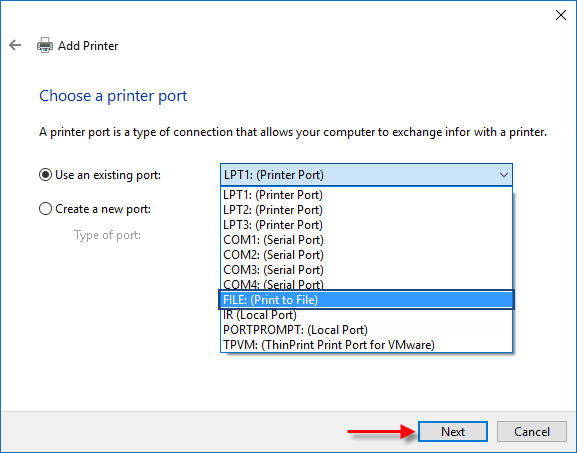
Select Use an existing port, select FILE: (Print to File) from its drop-down menu, and click on Next.
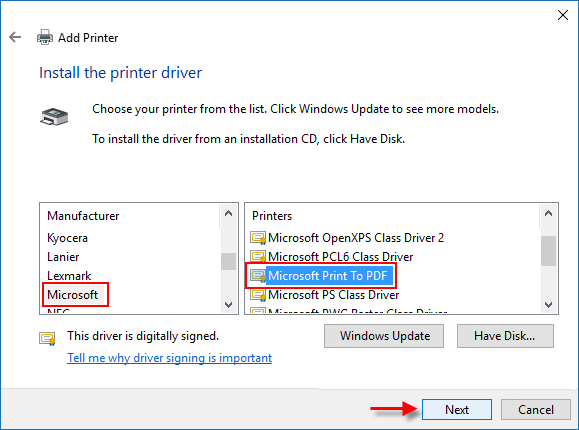
Select Microsoft in the left pane, select Microsoft Print to PDF in the right pane and click Next.
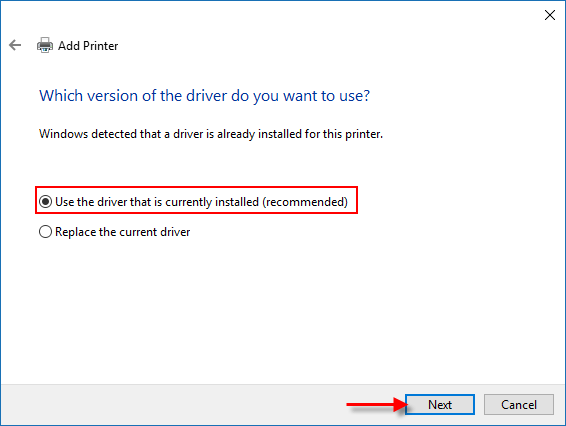
Select Use the driver that is currently installed and click on Next.
Then click Next, and then click on Finish.
